Feeds:
Posts
Comments

Archive for August, 2018

I have a confession to make.  I get anxiety…when ordering coffee.  I know how to make it, but I don’t really know the ins and outs of how to order it.  One time I was at Dunkin’ Donuts and I asked for a medium coffee.  They asked if I wanted cream and sugar, and I replied, “Sure.”  When I received my coffee, I took a sip, and was taken aback by how sweet it tasted.  I opened the lid, and was also surprised by how light it looked.  I turn the cup over, and see they wrote a “3” in the cream section, and another “3” in the sugar section.  Now I know everyone likes their coffee differently – but to me – 3 creams and 3 sugars in a medium coffee seems like a lot.  When I make it at home, I usually put either a 1/2 a packet to a full packet of Splenda, and then add 2 tablespoons of cream.

One time I went to Willoughby’s with a friend.  She ordered an “iced, nonfat, mocha latte”…Is that just a fancy way of asking for a chocolate milk?  What’s the difference between an latte and a frappe?

One other time I was at Starbucks.  The guy in front of me asked for a “Red Eye”.  What was that?  I stood behind him, frantically trying to find it on the menu.  It wasn’t there!  I looked it up when I got home.  I found out that Starbucks, as well as many other restaurants, has a hidden menu!  A “Red Eye” is a shot of espresso in your coffee.  How are we supposed to learn about this stuff?

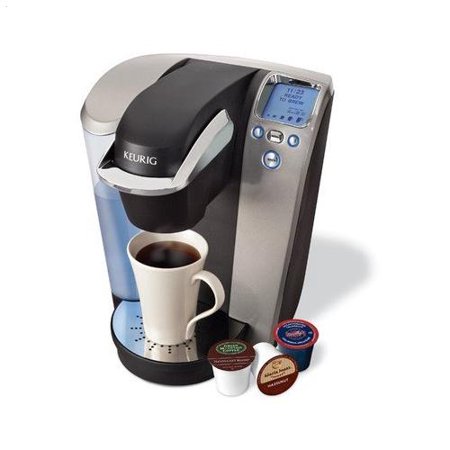
I didn’t drink coffee for the first 25 years of my life.  Back then, I never really cared for it.  But one Christmas I received a Keurig as a present.  I’m sure you are all familiar with them.  You put in the little K-Cups and less than a minute later out pops a cup of coffee.

KeurigK75

I then embarked on my first mission:  ‘To find the perfect K-Cup.’  I tried different kinds of roasts.  I started out with the lighter ones, and eventually made my way over to the darker/bolder roasts.  I never really acquired a liking for the Italian or French roasts.  From a flavor standpoint I liked the Island Coconut and Rain Forest Nut.  For brands, Green Mountain Coffee makes good coffee.  Much like the coffee we have a work, I didn’t care much for the Starbucks blends.  They were a little too bitter and burnt tasting for me.  However, the K-Cup that I thought was consistently the best, was ‘Seattle’s Best House Blend.’  It has a nice full consistency, isn’t bitter, and tastes good.  At this point, I’d say I’d found the perfect K-Cup.

Seattle's Best House Blend.jpg

When I had first started drinking coffee, I noticed that my hands would shake a little.  Sometimes my eyelids would twitch.  After a quick search, I realized I didn’t have cancer, it was just my body adjusting to caffeine.  They eventually went away.

As I’ve mentioned before I listen to a lot of productivity podcasts.  I also stumbled upon this next topic in the Tim Ferriss book “The 4-Hour Chef.”  In both of those, I was noticing a trend in suggesting whole-bean coffee.  The “coffee snobs”, which I’ll refer to them from this point forward, mention that if you want to taste coffee how it’s meant to be tasted, you really need to make it fresh using whole beans.  K-Cup coffee is great and all, but they kept touting how much better whole-bean coffee would taste.  I embarked on my next adventure.

How was I going to brew these whole beans?  I’m the only coffee drinker in my house, so I didn’t want to buy one of those coffee makers that makes 12 cups of coffee.  I typically only have one cup a day.  That’s when I decided to go with the Aeropress.

Aeropress

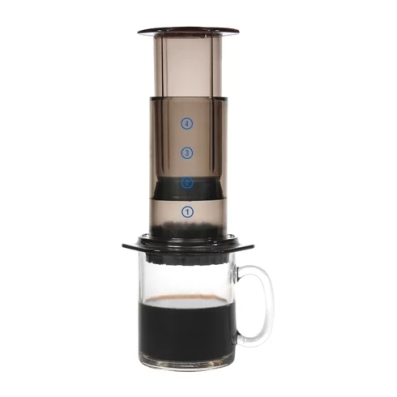
The Aeropress is a pseudo french press that makes one cup of coffee.  You essentially take ground coffee, pour it in the Aeropress, dump some water in, and press it down into your mug.

But I still needed a way to grind the beans.  At first I thought, ‘Hey, I’ll just use what I already have.  I can use a Magic Bullet and grind the beans that way, then throw them into the Aeropress.  But the coffee snobs didn’t like that.  They said metal blades and coffee beans are a big no no.  Metal blades don’t grind beans consistently, and similar to a garlic press – people were recommending crushing the beans to get the full flavor out.  You had to grind them using a burr.  That’s when i stumbled on the Javapresse.
Javapresse

The Javapresse is a manual coffee grinder.  You can find it for about $24 on Amazon.  Fancier versions cost more, but this one gets the job done.  It’s portable.  If there’s a fancy coffee you like, and you don’t want to drink what the hotel is offering, you can make your own coffee using the Javapresse.  Since it’s not electrical, you can use it when camping.  It’s also adjustable.  Inside is a crank with 18 different settings to grind your beans from coarse to fine.  For the Aeroress, I usually keep it somewhere in the middle.  So while it is cheap, portable, and adjustable, I was also finding that it was time consuming.  I was adding 5-7 minutes to my morning routine grinding coffee.  That’s a lot when you’re also trying to get two kids ready for school.  There had to be a quicker way!

After some heavy analysis paralysis research, I finally settled on the Capresso electric burr grinder.

Capresso

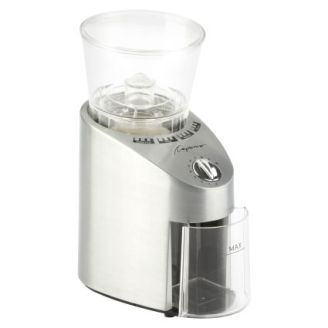
In my research, I knew it wasn’t going to be ‘the best’.  But it was ‘the best value.’  It’s quieter than most.  It’s easy to use.  It’s adjustable.  And it grinds beans consistently.  On the downside, it can be a little messy.  When I take it apart to clean it when I’m switching coffee beans, there is a decent amount of ground coffee inside the machine that I need to use canned air to blow out.

Back to the present day.  I’m currently on a mission to find ‘the perfect whole bean coffee’ to grind in my Capresso, and brew in my Aeropress.  I’ve found a lot of Aeropress recipes online.  I really enjoy using the ‘inverted method’ where you turn the Aeropress upside-down and brew the coffee for a few minutes in the Aeropress before flipping it back over and pressing the coffee into your cup.  There are many different factors that come into play when using the Aeropress.  One of which, is how many beans you use.  Which of course, you’ll need to weigh in grams on a food scale.

Food Scale

You can adjust how fine you grind your beans, again using the burr grinder.  You can adjust how long you let it brew in the Aeropress before pushing it into your cup.  And last but not least, you can adjust the water temperature.  Which leads me to a possible future purchase.  You see, the coffee snobs say to make a really good cup of coffee, you have to get the water to about 205 degrees.  I currently use the Keurig to heat my water, and the max temperature on that is 192 degrees.  So my next purchase will likely be for some sort of electric kettle where I can set the water temperature.

In conclusion, I have one last confession to make.  If I’m being honest, at this point in my endeavor, it all tastes about the same.  Here’s hoping the perfect whole bean is still out there somewhere.

Read Full Post »

Every now and then I listen to a podcast where the host is interviewing an author – and the question comes up as to why the interviewee wrote their book.  The reply is usually something along the lines of, “I had to write this book”, or “I felt compelled to write it”  or “Something inside me was bursting to get out….I couldn’t not write it.”  There are two topics for myself that come to mind when I hear that.  This post is one of them.

In full disclosure, the content for this speech was influenced by material that can be obtained in David Allen’s Getting Things Done (GTD) book and methodology, as well as from the Asian Efficiency podcasts (Episode 1, Episode 2) on this topic.  I have yet to read Getting Things Done, but am familiar enough with the methodology.  Reading the book is on my Book To Do List.

While I didn’t feel 100% confident giving the speech prior to reading the book, I am a big proponent of Inbox Zero.  I work at a very large company, and when I saw someone write a blog post about how they manage their inbox, I had some concerns.  Their approach, while doable, involved a lot of categorizing and labeling.  I thought my approach was more efficient and time saving.  I don’t think it’s perfect, and I may have changes after reading the book.  So without further adieu, here is Toastmasters Speech #2:  Invest in Yourself: Own Your Inbox, Own Your Day:

There are those series of Capital one commercials where Samuel L. Jackson asks, “What’s in your wallet?”  Today, I’d like to take a spin on that and ask you, “What’s in your Inbox?”

A lot of my daily work revolves around email.  It’s the primary way I send and receive communications with colleagues.  Yet, I was finding that I was constantly struggling with ‘trying to keep up’ with the constant flurry of emails that come in.  I was having trouble getting back to people on critical emails, yet I was also doing ‘too good a job’ of keeping on top of emails that were, in retrospect, less important.  I had to find a way to plan, process, and prioritize my inbox.

Today, I’d like to share some advice on how I took control of Outlook, and explain how I focus on doing the right work at the right time.

Before I get into the details of my presentation, I wanted to share some quotes with you.  You can read them yourself, but the one that sticks out to me is “Email is a ‘To Do List’ that you let other people write on.”

Quotes

In today’s world, where we’re all too accessible, we let ourselves get carried away with the compelling need to respond to people right away – that we forget about what’s important – and that is making sure we’re working on the right things at the right time, and doing them the right way.

Before I go on, I wanted to provide a brief disclaimer.  The approach I am about to describe is what works for me.  This is not the one solution to your email problems.  These are some steps I’ve taken that help me manage my day better.  Feel free to apply one, some, or all of these concepts in different ways that fit to your daily routine.  At the end of the day, do what works best for you.

What does your inbox look like?  Would it look something like this?

InboxBefore

There are 20 unread emails sitting in our Inbox.  There are countless red flags spread throughout marked ‘For Follow Up’.  The main Inbox has a bunch of subfolders for categorizing emails, because, you know, we plan on looking them back up someday.  Last but not least, in the main Inbox, there are over 4,000 unread emails.  Let’s try to go from something like that, to something like this…

InboxAfter

Here, on the right hand side, there are no unread emails sitting in our Inbox.  No red flags marked for follow up.  We have one subfolder for archiving old emails.  And last but not least, when we’re done with our email management routine, there are zero emails sitting in our main Inbox.

The Foundation

How do we get there?  There are really only two main parts to get this going.  The first part is setting the foundation.  once this is set up, you’re good to follow the process.

IntroToSteps

In setting the foundation, there are a few things you would modify.  In the middle of the Outlook toolbar is a section called “Quick Steps”.  If you click the arrow in the lower right corner, it will bring up a window to “Mange Quick Steps”.

QuickStepToolbar

In that window,  you can re-arrange the content and order things appear in the Quick Steps toolbar.  In the screenshot above, ‘Archive’ is the first quick step.  I also have a shortcut key assigned to this action.  At the press of a few quick keystrokes (personally CTRL+SHIFT+1), I can quickly archive an email I am done with.  To the right of that, I also set up a quick step to Create a Task (with my shortcut key personally being CTRL+SHIFT+2) with the email as an attachment.  I’ll walk you through how this all works shortly, but in summary when an email requires some follow up action, I can quickly set up a task to track those actions, and attach the email inside that task.

OneArchiveFolder.JPG

The other thing that needs to be set up is to create one, and only one, archive folder.  Those of us that have been around email long enough have memories of the difficulties of finding old emails.  However, Outlook’s search capabilities have greatly improved over the years.  The other thing to think about is what is referred as the ‘search/sort tradeoff’.  How often do you actually pull up old emails?  Probably less often than you think.  Then why do you spend so much time trying to sort it in the right folder?  Dump it all in one archive folder, and have faith in the search tools.  Now that we’ve set the foundation, let’s talk about how to use it.

The Process

There’s something called the “Two Minute Rule”.  When reviewing your emails that come in, you want to ask yourself these 3 questions.

  1. Does this email require some action on my part? – If no, then archive the email.
  2. Does this email require an action that can be completed in less than two minutes?  – If yes, then do it now.  You’ll spend more time trying to figure out ‘what to do’ with it than the time it would take to actually complete the task.
  3. Does this email require an action that would take longer than two minutes to complete?  – If yes, it becomes a task.

Task1

In the screenshot above, we see an email (1) that has come in.  It requires an action that takes longer than two minutes to complete.  I can utilize the shortcut in the Quick Actions toolbar (2) that we set up earlier to automatically open a new task window and attach the email within the task itself (3).

Task2

There are some additional things to think about when adding details to your task.

  • Subject Name –  Put an action verb in the subject name.  Give it a meaningful title that clearly states what is being asked. (This will help later when looking at your list of tasks.)
  • Start Date/End Date – Feel free to utilize both.  Maybe you want to delay the start date of your task if it isn’t urgent.
  • Reminders – This may come in handy if you need to follow up with yourself or with others on tasks that require additional actions of others before you can mark it complete.
  • Prioritization – Self explanatory.   I personally keep most tasks at Normal, but you can set some to high if you wish.
  • Descriptions – Finally, in the body of the task window, enter any meaningful descriptions that will help you later on.  This could include action items that need to be completed prior to the task being fully complete, dates those action items are completed, and any additional information that might help you when working the task later on.  I tend to forget things easily so I take advantage of this area to help me remember details that would be useful when working the task.

AllTasks

The main Tasks window can be accessed by clicking the Tasks button on the far left in in Outlook.  Here, you can see a list of all outstanding tasks.  This window can be customized based on your preferences.

You have many options for sorting and/or grouping tasks.  One option is to sort/group by status.  One status that can be helpful is “Waiting on Someone Else”.  There may be a task that you are ultimately responsible for – but in order for you to continue you need a deliverable from someone else.  Be careful with this status however – although you are waiting on something from someone else, you are ultimately responsible for seeing the task through to completion.  I tend to set weekly calendar reminders for myself to check in with people associated with tasks that I am responsible for completing.

Tasks can also be sorted by any of the available date fields.  some may prefer to see tasks sorted by due date.  others may wish to look at them sorted by start date.  another option is to sort by category.  I personally don’t use this option, but others may find it helpful if they like to organize their tasks into categories.

Final Tips

Be sure to dedicate time to the process.  Develop a cadence that works for you, whether it be daily, a few times a week, or once a week to do a review of your inbox.  Avoid attraction to distraction.  Disable or decrease notifications.  Personally, I have my new email notifications set to 3 seconds at 20% transparency.  I forget what the default is, but I believe it is around 5-7 seconds, which feels like an eternity and can be a major distraction.

Don’t hesitate to go offline.  I promise you we’ll all be here when you get back.  And last but not least, don’t overdo it with the sorting/categorizing.  Remember the ‘search/sort tradeoff’ we spoke of earlier.

These tips have really helped me ensure that I get back to the right people, at the appropriate times, while at the same time reducing my sense of feeling overwhelmed.  I hope you’ll take some of the tips I’ve suggested to take control of your Inbox.  Thank you.

Extra Credit

This next slide wasn’t in my official speech.  However, this was one slide I wanted to include but had to ‘cut for time’.  I decided to place it at the very end of my presentation document, because I liked it a lot, but just couldn’t fit it in the 5-7 minutes I was given.  However, my speech ended up being well received, and one of the other Toastmasters asked for advice on how to separate urgent/non-urgent and important/non-important emails.  You would have thought I planted her in the audience.  I laughed, and brought up this slide in the Q&A that followed.  I couldn’t have been happier that she asked the question.
EisenhowerMatrix

Read Full Post »